

It’s easy to go into a grocery store and grab a bag of carrots, but why not grow them yourself? Homegrown carrots offer added flavor, haven’t been treated with chemicals, and are on hand when needed.
Growing your own carrots isn’t complicated once you understand what they need. In this guide, we’ll cover the basics of growing carrots, including:
- Choosing the right variety for your climate.
- How to properly plant carrot seeds.
- Why frost can improve carrot taste.
- When carrots are ready to harvest.
If you want straighter, sweeter carrots with fewer failures, start here.
Step #1: Choose Your Carrot Type
Picking the right carrot variety is critical, and there are several types of carrots. All carrots are grown the same way, but they differ in shape, color, and harvest timing.
If you choose the wrong type, your carrots will struggle. Consider the following factors before settling on any carrot variety.
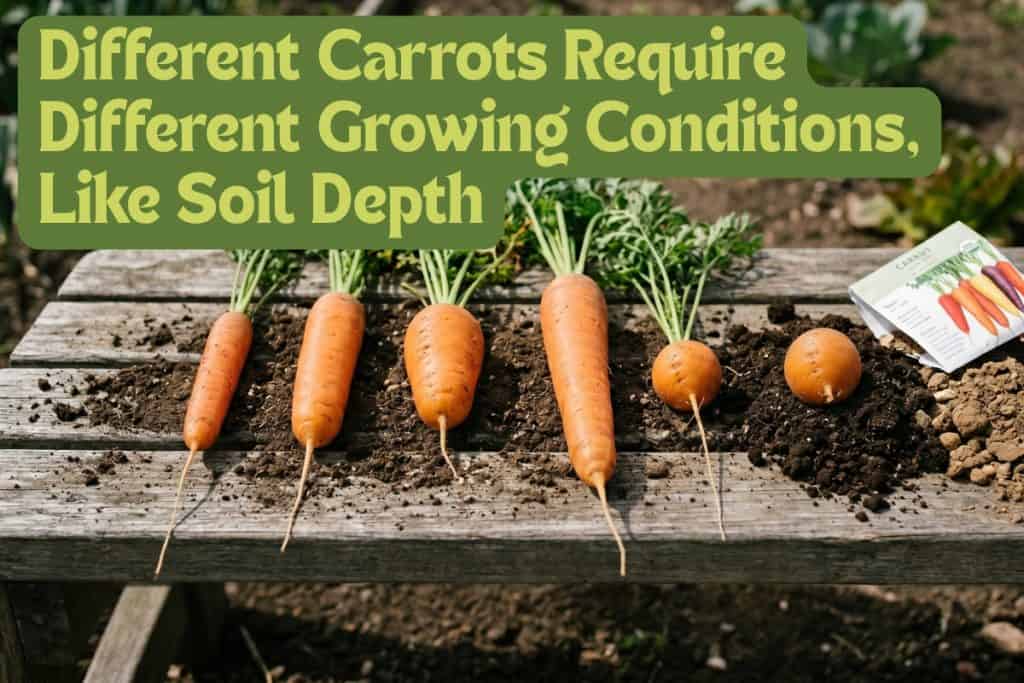
Root Length and Soil Depth
Root length and soil depth must be considered together. Long, tapered carrot varieties like Autumn King can develop roots that reach 12 inches (or more!), so this type needs a deep, stone-free bed to develop cleanly. Other varieties won’t need as much space.
Different carrots can also thrive in different soil types. For example, if your soil is heavy clay or rocky, a shorter, stubbier variety like Chantenay will produce a better crop.
Days to Maturity
Carrots are typically mature within one of two timeframes:
- Fast Carrots: 60 days. Ideal for short summers, succession sowing, or early spring slots
- Main-Crop Carrots: 75 to 80 days. Ideal for longer seasons when bulk harvest or storage is the goal
It’s important to choose a variety that fits your local seasons. Carrots prefer cool weather, and summer heat can present problems.
How Will You Use Your Carrots?
If you are growing for fresh eating, sweet, smaller finger types are ideal. If you are growing for cooking, juicing, or long-term storage, larger varieties hold their texture better through heat. For farmers’ markets, or where uniformity and appearance matter, classic types like Imperator will give you the best-looking crop.
Popular Varieties
Once you’ve considered the above, you can choose your carrot type. Popular picks include:
- Nantes: An all-purpose variety suited to most soils; matures in 65 to 70 days.
- Chantenay: Short, broad-shouldered roots that thrive in heavy or shallow soils; matures in 70 to 75 days.
- Autumn King: A large main-crop variety with long, tapered roots requiring deep soil; matures in 80+ days.
- Amsterdam Forcing: A small, slender fast-maturing finger type; matures in 60 days.
- Imperator: A long, tapered, high-yielding carrot that requires deep soil; matures in 75 to 80 days.
- Parmex (Ball Type): Has short, round roots perfect for shallow soils, containers, or heavy clay; matures quickly in 65 days.
Step #2: Prepare a Growing Site
A poor planting location — or poorly prepared bed — can ruin a carrot crop. That’s why site selection and bed preparation go hand in hand.
In general, growing sites with more sun create better flavor, faster growth, and stronger roots. Combine that with a loose, obstruction-free bed, and you’ve set your crop up for success.
4 Qualities of a Good Planting Site
- Full sun for 6 to 8 hours daily.
- Loose, workable ground free of stones and debris.
- Good natural drainage with no standing water.
- Low weed competition.
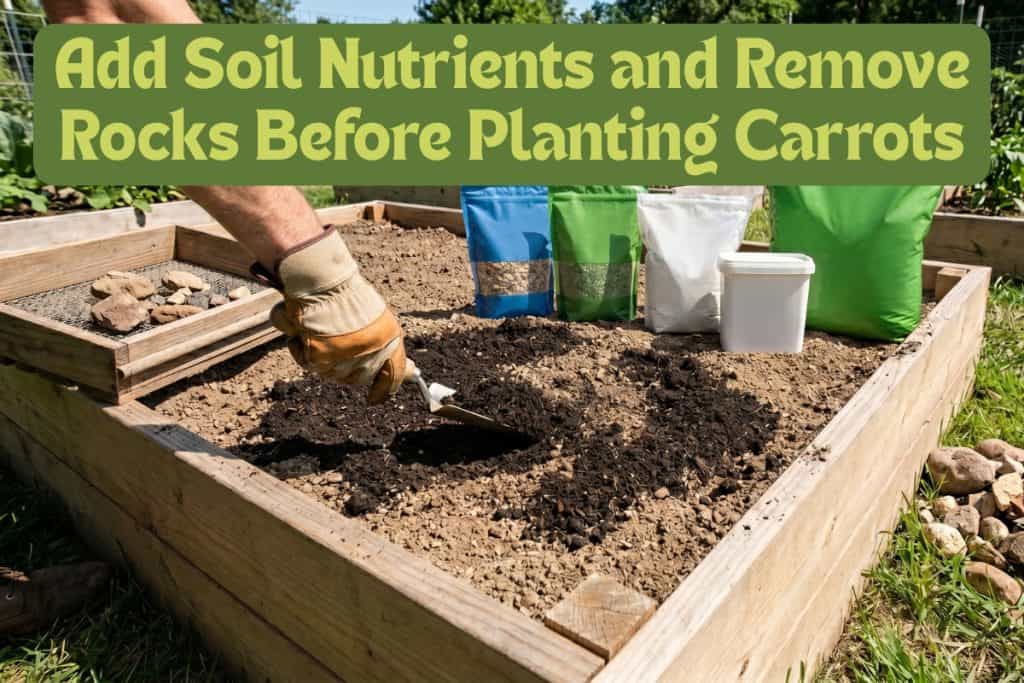
Once you’ve chosen a suitable site, prepare the soil to a depth of 10 to 12 inches, removing every rock and piece of debris you can find.
Add Soil Nutrients
Carrots grow best in loose, free-draining soil, which helps roots grow straight while balancing drainage and moisture. You should also aim for a pH of 6.0 to 6.8.
So, before planting, work a 2- to 4-inch layer of compost into your soil. This will improve texture, drainage, and organic matter content.
Carrots benefit most from phosphorus, potassium, and calcium, which can be supplied through compost and mineral amendments where needed. Too much nitrogen promotes leafy tops and hairy roots.
A pre-plant fertilizer formulation of 0-10-10 or 5-10-10 provides the proper balance for a root crop like carrots. Apply lightly to the sides of the seed row or seed tape before covering the seeds.
Growing other root crops? Check out our guide to growing sweet potatoes here.
Natural Soil Amendments
For gardeners who prefer to use natural soil amendments, the following options provide a balanced nutritional foundation:
- Fishbone Meal: Adds phosphorus for root strength.
- Kelp Meal: Adds broad-spectrum trace minerals.
- Gypsum: Adds calcium without altering soil pH.
- Azomite: A type of volcanic mineral ash that provides up to 70 trace elements.
Step #3: Know When to Plant
Carrots are a cool-season crop, but established plants can grow in a wide range of temperatures.
As you’re considering when to plant this vegetable, the most important timing factor is not air temperature, but soil moisture and the condition of the soil surface.
General Carrot Planting Windows
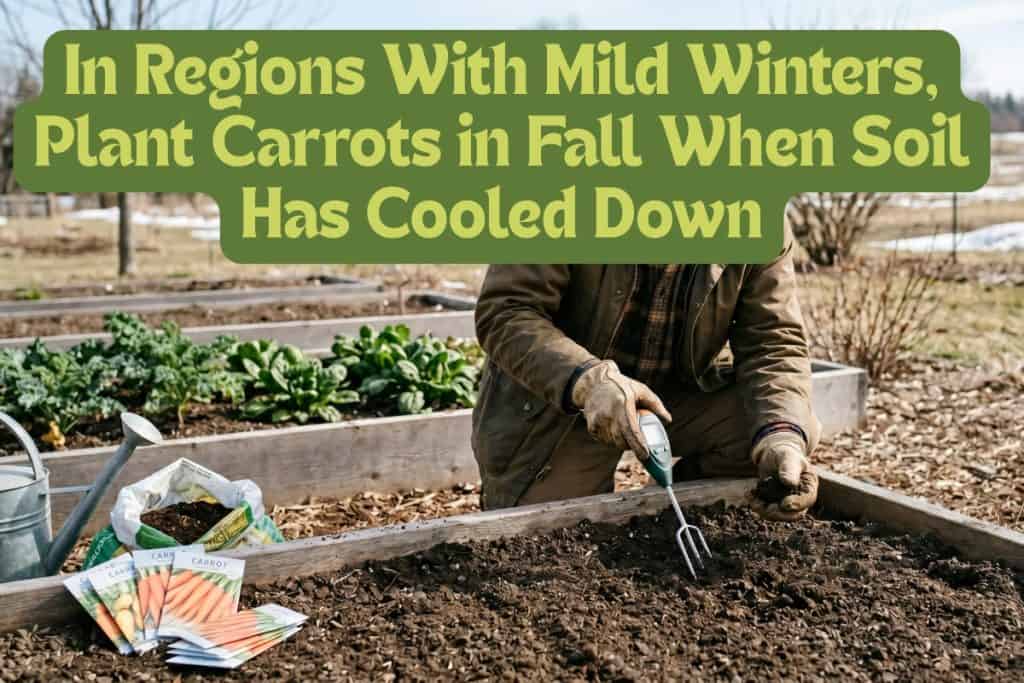
- Mild Winter Areas: In these regions, plant in the fall after the soil cools.
- Warm Southern Areas: Planting in late fall through winter may work if a warm stretch allows good germination.
- Cold Northern Areas: Wait until late winter or early spring when soil starts warming.
Don’t overlook late summer planting, either. This is one of the best times to grow carrots. Warm soil means faster sprouting, and cooling fall temperatures can improve root flavor.
If winters are mild where you live, fall-sown carrots can be an excellent option. Cool weather improves flavor, and roots held through winter are commonly sweeter. In regions where temperatures rarely drop below 20 degrees Fahrenheit, overwintering in the ground is often possible.
If you’re planning a long-term vegetable bed, read our asparagus growing guide here.
Step #4: Sow Carrot Seeds Correctly
In order to grow your carrots, you’ll need seeds. Carrots are almost always directly seeded, as this edible root forms immediately below the seedling. This makes transplanting impractical.
So, to plant your carrots, sow seeds at roughly 15 seeds per row foot.
Germination is never perfect, and having extra seedlings to thin later is far better than gaps. The goal is a full, even stand where seedlings have room to develop before thinning.
Below are three different ways you can sow carrot seeds, depending on your available space.
Banding
Banding, or sowing seeds in a narrow concentrated strip rather than a single line, spreads seedlings slightly across the row width instead of placing them directly one behind another.
This gives each root a little more lateral room while still producing a full, productive stand, and is more forgiving than trying to place each tiny seed individually.
Double Rows
Double rows are one of the most practical layouts for in-ground beds. Two close lines, or bands, of carrots planted side-by-side use bed space efficiently, keep planting density manageable, and simplify weeding.
Plus, once your carrots are established, the combined foliage canopy shades out weeds naturally.
Seed Tape
Seed tape, or seeds embedded in a narrow strip of biodegradable paper, can be purchased for several carrot varieties. This option can make seeding easier, saving you time and effort, and it provides perfect spacing.
6 Steps to Sowing Carrot Seeds
Follow these steps to properly sow carrot seeds:
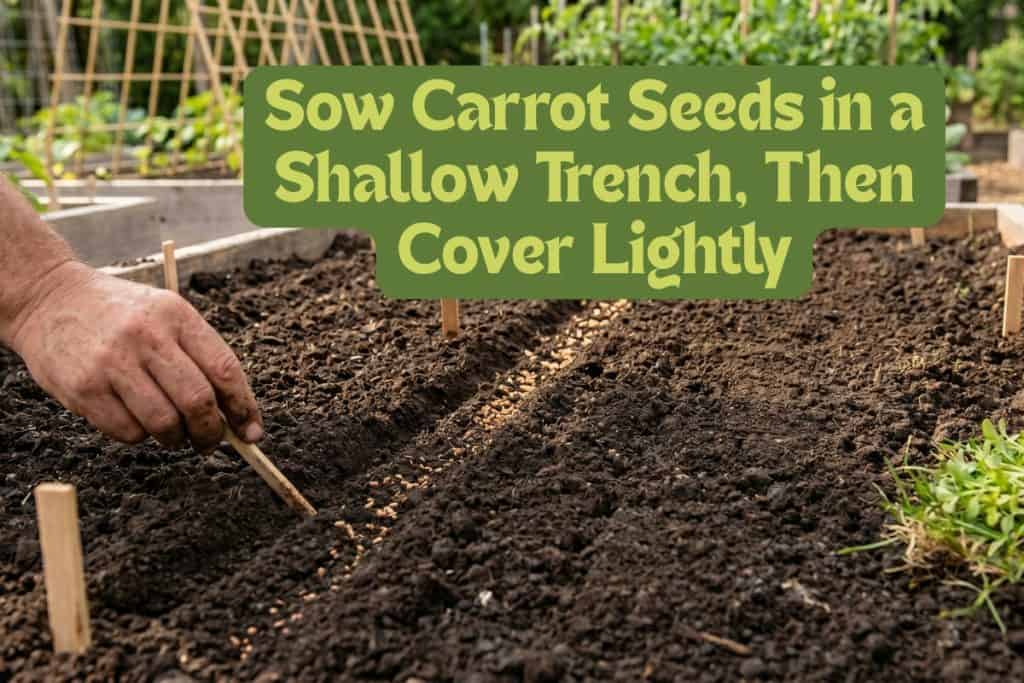
- Always water soil the day before sowing so the bed is moist.
- Create a shallow furrow (or trench) no more than ¼- to ½-inch deep.
- Sow seeds lightly along the row in a band; spacing doesn’t need to be exact.
- Cover seeds lightly with fine soil.
- Firm the soil gently with your hand or a flat board for good seed-to-soil contact.
- Space rows approximately 12 inches apart.
Step #5: Keep Seeds Moist
Because carrot seeds are planted close to the surface, they can dry out quickly. If the top layer of soil dries out before the seeds sprout, those seeds are lost.
However, it’s important to balance your watering. You want seeds to stay moist, but you should avoid heavy overhead watering after sowing. It can dislodge seeds, compact the soil, and form a crust that seedlings can’t break through.
Instead, water with a fine mist, lightly and often. Below are two moisture strategies that will make germination more successful.
Drip Irrigation
Drip irrigation, which uses drip hoses to deliver steady moisture directly into the row, is the preferred watering method. It prevents crusting and makes it easier to keep moisture even.
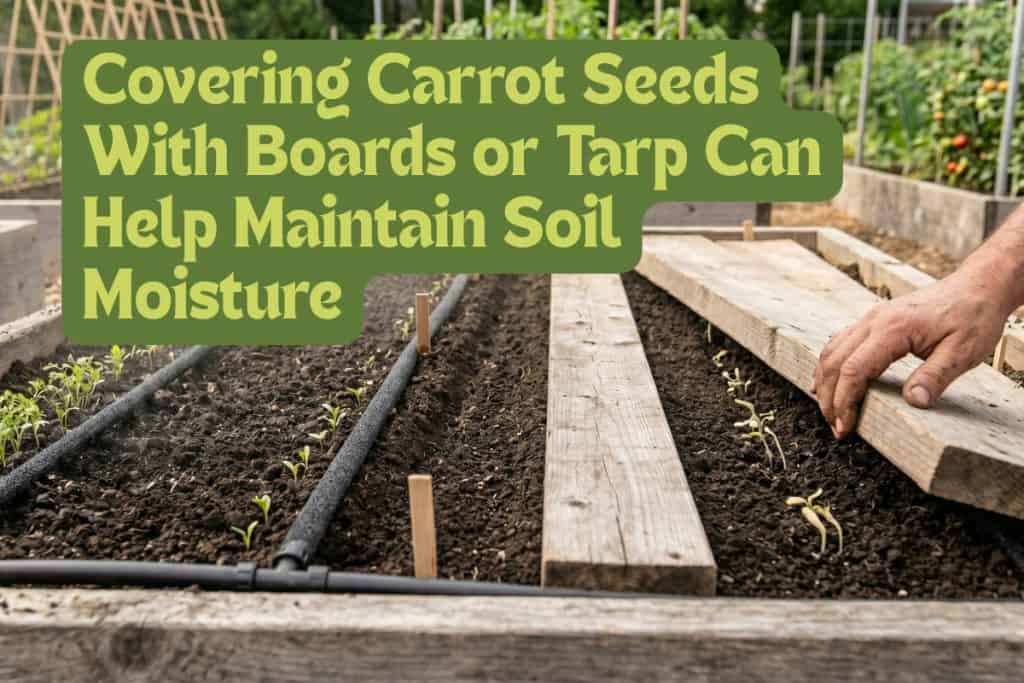
Cover With Board or Tarp
Cover the row with a tarp or flat board (in sizes of 1 x 4 feet or 2 x 4 feet) immediately after sowing. This is an effective and under-used trick in carrot growing. The board shades the soil, traps moisture, and prevents the surface from drying out.
Check underneath the boards or tarp daily and remove it as soon as seedlings appear.
When Do Carrot Seeds Germinate?
- In Cool Spring Conditions: 2 to 3 weeks or longer.
- In Warm Summer Conditions: 7 to 10 days.
Step #6: Use Succession Sowing for a Continuous Harvest
Rather than sowing your entire bed at once, here’s a trick that will ensure a continuous, rolling harvest: Sow seeds every 3 to 4 weeks from early spring through midsummer.
Another perk of spaced timing? You’ll be less likely to match peak carrot fly emergence.
How to Plant on a Succession Sowing Schedule
- Early Spring: Once soil reaches 45 degrees Fahrenheit, sow a fast-maturing variety like Amsterdam Forcing or Chantenay under cover for protection.
- Late Spring/Early Summer: Sow a main-crop variety (like Autumn King or Nantes) directly without cover.
- Midsummer: Sow a final batch of a fast-maturing or finger-carrot variety for autumn harvest.
Step #7: Thin Carrot Seedlings
Once your seedlings start to sprout, thinning gives carrots the space they need to reach optimum size. If seedlings are left crowded, they’ll produce small, underdeveloped roots.
Aim to create 2 inches of space between each plant, with 1 inch of clear space on each side.
Note: If you used seed tape, thinning may not be necessary.
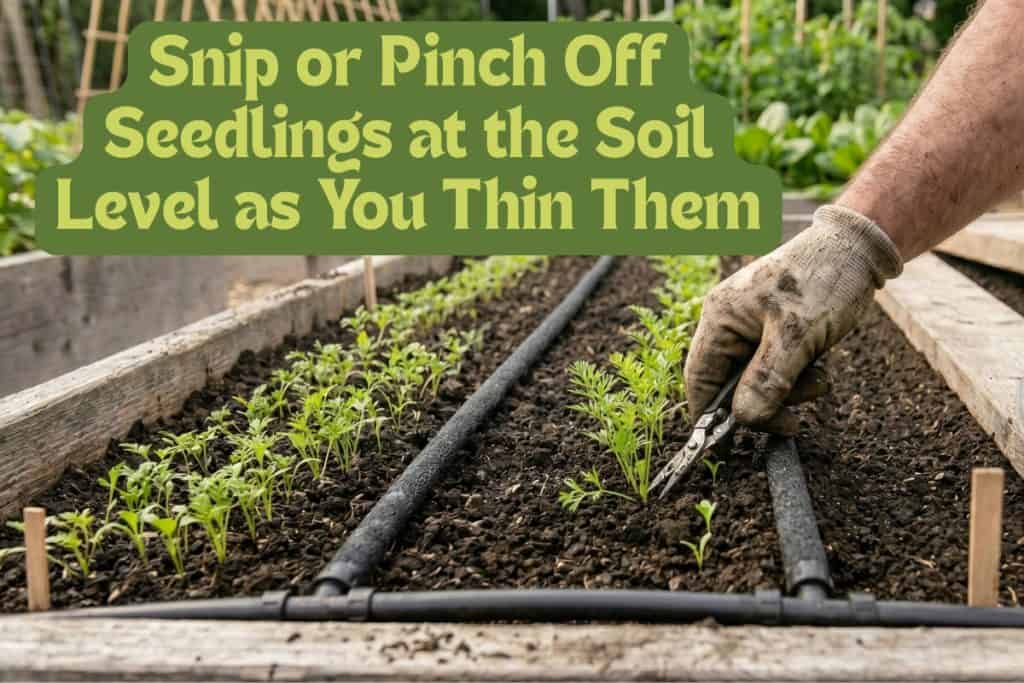
Carrot Thinning Checklist
- When: Once established seedlings reach 3 to 4 inches tall.
- Spacing: 2 inches between plants.
- Method: Snip or pinch off at soil level.
Harvest-to-Thin Method
Rather than removing all excess seedlings at once, many gardeners prefer to thin progressively by pulling the weakest plants as baby carrots over several weeks. This approach reduces waste, provides an early taste of the crop, and makes thinning more rewarding.
To do this, remove the smallest and weakest plants first. Continue doing so until the remaining plants reach the correct 2-inch spacing.
Step #8: Hill the Shoulders
As carrot roots develop, they push upward until their tops (or shoulders) rise above the soil line and become exposed to sunlight.
Exposed shoulders will turn green and develop a bitter flavor from chlorophyll formation. This doesn’t make them unsafe to eat, but it does impact carrot quality.
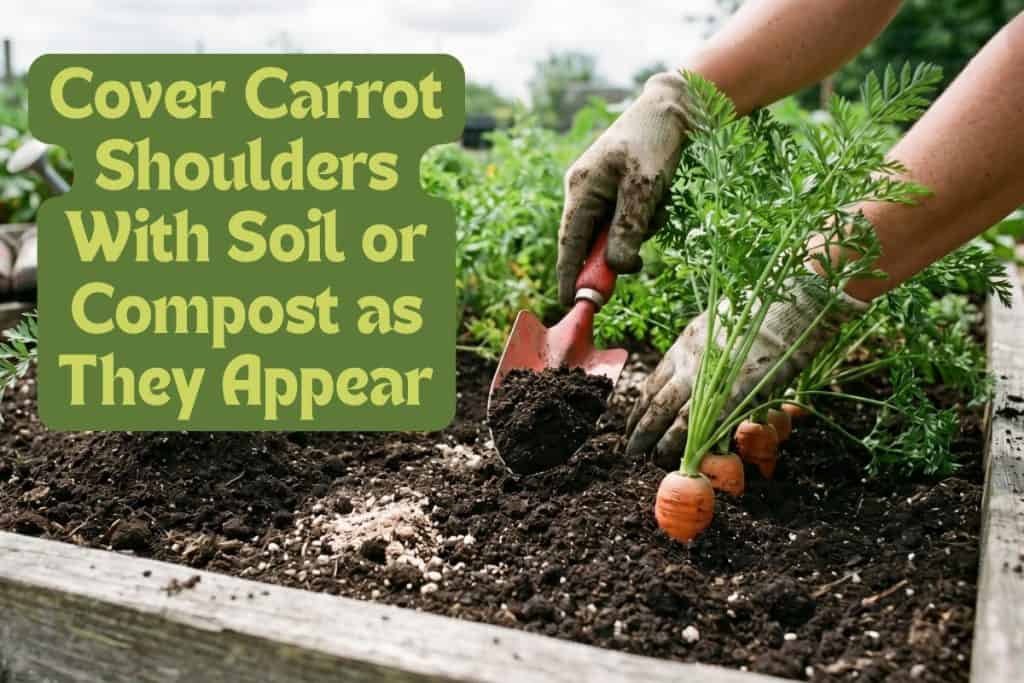
Check your bed weekly. If you notice shoulders starting to appear, apply loose soil or a light layer of compost over them.
This is a quick maintenance task that protects root quality all the way to harvest.
Step #9: Water Properly Throughout the Season
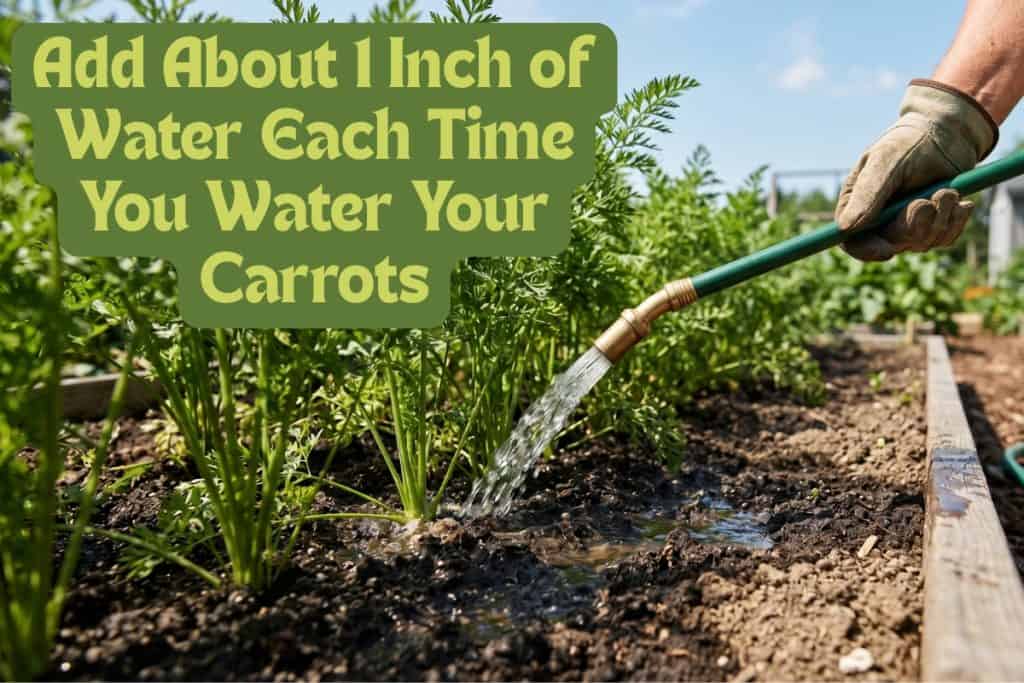
Once you’ve thinned your carrots, watering becomes the primary ongoing task. Carrots like soil that stays moist but never saturated. They can tolerate short dry periods, but they shouldn’t experience water stress.
Aim for 1 inch of water per week from rain or irrigation. Shallow, light watering keeps moisture near the surface and discourages downward root growth. Deep, infrequent watering encourages roots to grow downward.
In spring and fall, supplemental watering may not be needed. In summer, around germination time, watering needs will increase.
Carrot Watering Guidelines
- Keep soil from drying out between waterings.
- Avoid standing water at all times.
- Prioritize drainage, especially in containers.
Drip irrigation remains the preferred method throughout the season to deliver root zone moisture while reducing the risk of washing out the seedlings or fungal problems.
Do Carrots Need Mulch?
Mulch can help retain moisture, but it’s not always the right choice for carrot beds. Pests like pill bugs, slugs, gophers, or rodents can use mulch as hiding spots.
So, skip the mulch and rely on drip irrigation instead.
Managing Weeds, Pests, and Fertilization
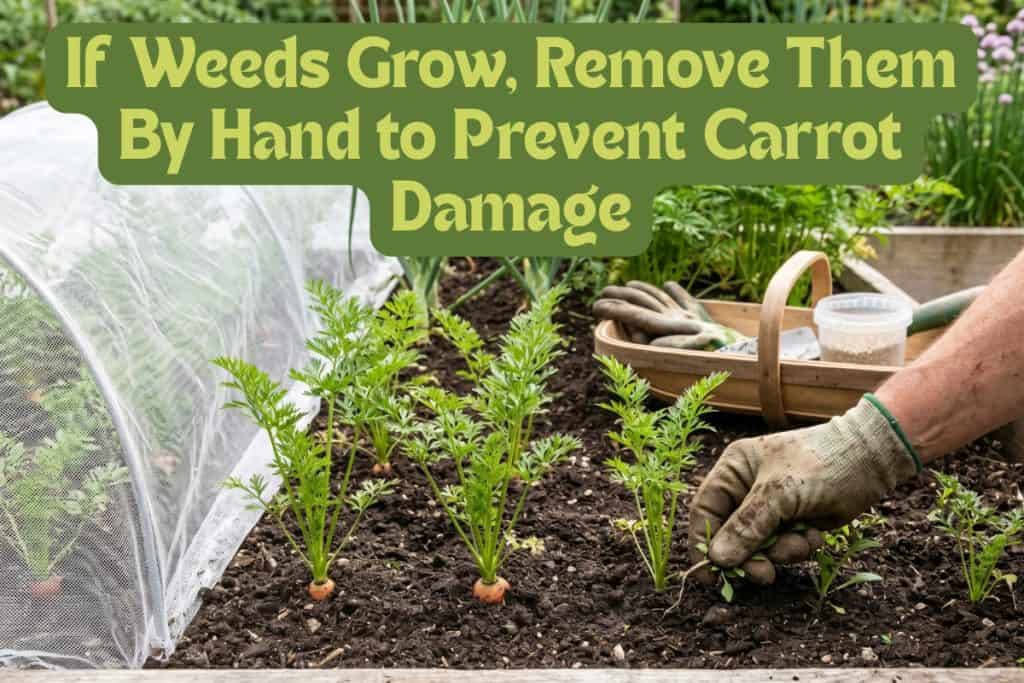
Weeding is most important in the first few weeks after germination, when carrot seedlings are small and can be easily overrun by weeds.
To remove weeds, hand pull them gently so you don’t disturb nearby carrot roots. Once carrots are established and thinned, they become more competitive, and weeding becomes less demanding.
Common Carrot Pests and Diseases
Carrots are not prone to pests or diseases, but a few specific concerns can reduce yield and root quality. The issues below are the most common for carrot beds.
- Carrot Fly: Larvae tunnel into roots, making carrots inedible. Companion planting with onions or chives helps prevent them, though results vary.
- Cavity Spot: Appears as sunken oval pits on the outside of the root. Caused by poorly drained soil; there is no cure once a root is affected.
- Willow Carrot Aphids: Small insects with tail-pipe appendages that damage leaves and can transmit Carrot motley dwarf virus, causing stunted, yellowing, distorted plants. Keep the crop covered with fine mesh until the canopy is established.
Fertilizing Carrots
Carrots need phosphorus for root strength, potassium for sugar development, and calcium for healthy cells, but they aren’t heavy feeders. In fact, if your soil was well-amended before planting, you may not need to fertilize at all.
If carrot tops look pale or growth seems slow at around 3 to 4 inches tall, a light application of 0-10-10 or 5-10-10 fertilizer will help. You can add a second light feeding when tops reach 9 to 10 inches in poor soil.
Just be sure to keep any nitrogen at low levels. If you over-apply nitrogen, you’ll need to water deeply for several days to move the nitrogen below the root zone. Signs you may have pushed nitrogen too hard include:
- Excessively lush tops.
- Roots with lots of small white hairs.
- More top growth than root quality.
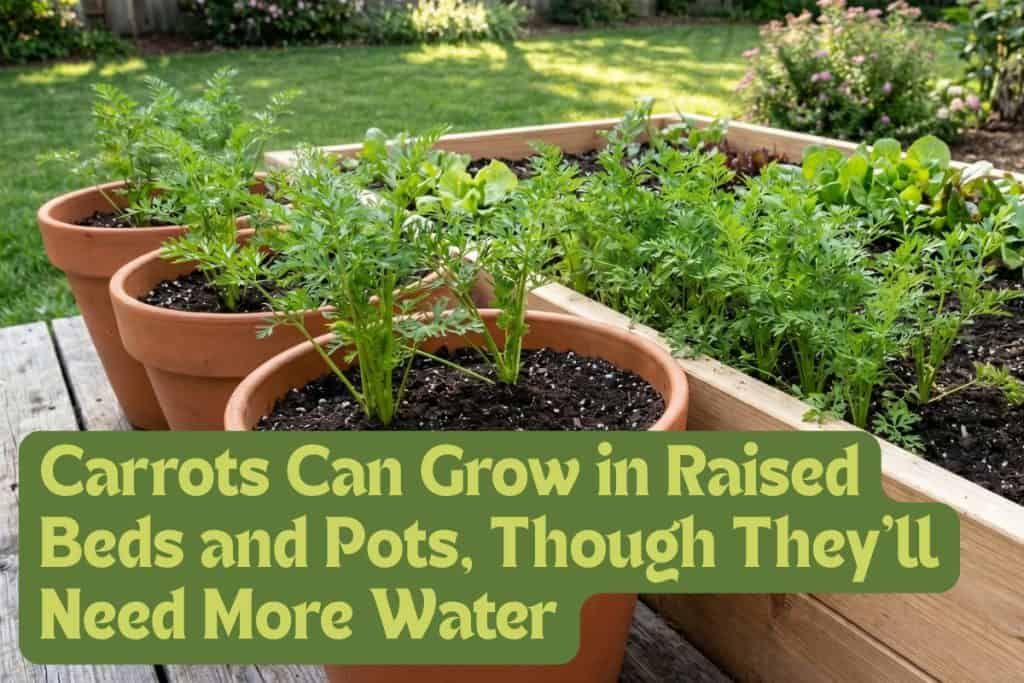
Should You Grow Carrots in Containers and Raised Beds?
Carrots do grow well in containers and raised beds. But you’ll need to meet a few key conditions.
Depth is most important. Containers and raised beds must be deep enough for the carrot variety you’re growing. Chantenay or Parmex carrots, which are naturally short, are the most practical choice for containers.
Container Growing Essentials
- Ensure the container has excellent drainage.
- Fill the container to the top with a quality potting mix (never garden soil).
- Create an even, level surface.
- Moisten before sowing.
- Sow shallowly, following the same depth guidelines as in-ground planting.
The same rules apply to containers: You’ll need to thin carrots after sprouting, and avoid waterlogged soil at any stage.
However, container-grown carrots usually need more frequent watering than in-ground plants. You can choose soil mixes with water-holding crystals (tiny particles that absorb water, then slowly release that moisture back into the soil) to help keep moisture consistent.
If you’re interested in other plants primed for container gardening, learn how to grow a pineapple here.
Growing in Raised Beds
Raised beds offer the best of both worlds because they offer the depth of an in-ground garden with the drainage and soil control of a container.
If you’re growing carrots in a raised bed, fill it with a mix of compost, perlite, and garden soil or purchased raised bed soil mix to produce successful, well-formed crops.
Harvesting Carrots
Carrots can be harvested all at once, but they don’t need to be. This flexibility is one of the crop’s big benefits. Most varieties begin reaching useful size around 70 to 75 days after sowing, though timing depends on weather, season, and the pace of growth.
The most reliable indicator carrots are ready to harvest isn’t the calendar; it’s the root itself. Check carrots by brushing soil away from the crown and looking for shoulders that are over 1 inch across.
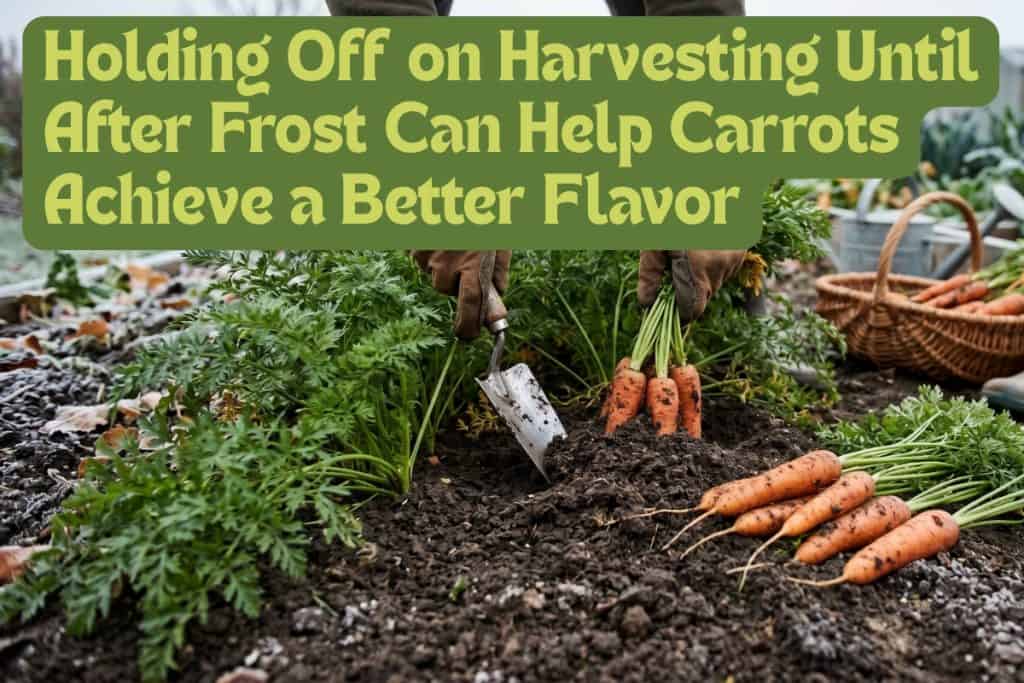
You may want to leave carrots in the ground through the first fall frosts. This can noticeably improve flavor, as cold temperatures trigger the plant to convert stored starches into sugars, producing a sweetness that a summer-harvested carrot can’t match.
If you live in a region where the ground doesn’t freeze solid, carrots can remain in the bed well into winter and be harvested as needed. The soil will act as natural cold storage, keeping them firm and fresh for weeks.
4 Signs Carrots Are Ready to Harvest
- Shoulders at the soil line have visibly sized up.
- Crown is over 1 inch across.
- Overall carrot diameter suits your needs.
- Carrots feel firm and well-formed.
If you’ll be harvesting multiple times, prioritize the largest roots first and look for thicker stems at the soil line. This reduces pressure on storage space.
How to Harvest Carrots
- Insert a garden fork beside the row and tilt upward gently.
- Never pull carrots by the foliage to avoid breakage.
- Twist foliage off at the crown, don’t cut; cut stubs may rot in storage.
- Let roots dry for 1 to 2 hours before bringing them inside.
Onions also need gentle removal during harvest; learn how to master this plant in our onion-growing guide here.
Sorting and Storing Harvested Carrots
Sorting carrots before storing them is critical. One rotting carrot can spread decay through every root around it and ruin your batch within weeks.
Inspect each carrot carefully. Set aside any that are cracked, forked, damaged, or showing the beginnings of soft rot for immediate use or composting.
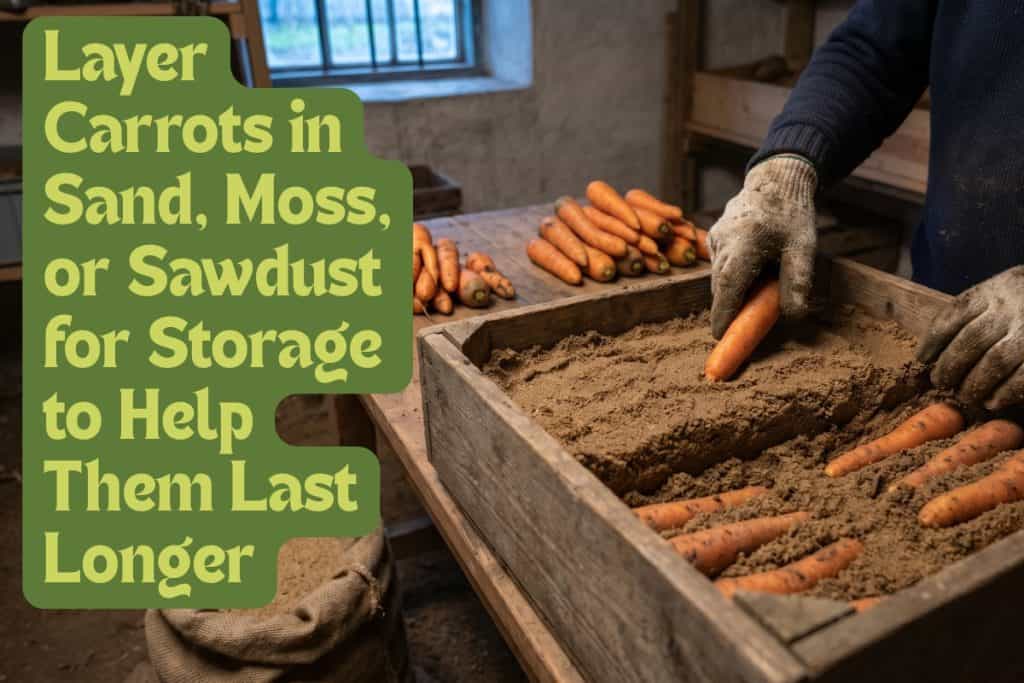
Then, you’re ready to store them. The most reliable long-term storage method is layering the veggies inside a cool, dark, and well-ventilated container with a layer of just-damp material to encourage humidity and prevent drying out and rot.
5 Steps to Store Carrots
- Place a base layer of slightly damp sand, peat moss, or sawdust in the bottom of a container.
- Arrange carrots in a single layer without the roots touching.
- Cover with another layer of the medium.
- Repeat until the container is full.
- Store at 32 to 40 degrees Fahrenheit in a cool garage, cellar, or garden shed.
Check on your stored carrots every 2 weeks. If roots begin to shrivel, lightly mist the medium; that means it’s too dry. If soft spots develop, repack with drier material and remove any affected roots.
When stored correctly, carrots will stay in excellent condition for 3 to 5 months.
Final Advice
Growing carrots requires care at the start, patience in the middle, and good judgment at the end. Get the basic steps right, and your carrots will become one of the most dependable and rewarding crops in your garden.
Happy growing!


2 thoughts on “The 7-Step Beginner’s Guide to Growing Your Own Carrots”
Thank you
I feel like I am well equipped
Thank you for visiting the site. Glad we could help.