

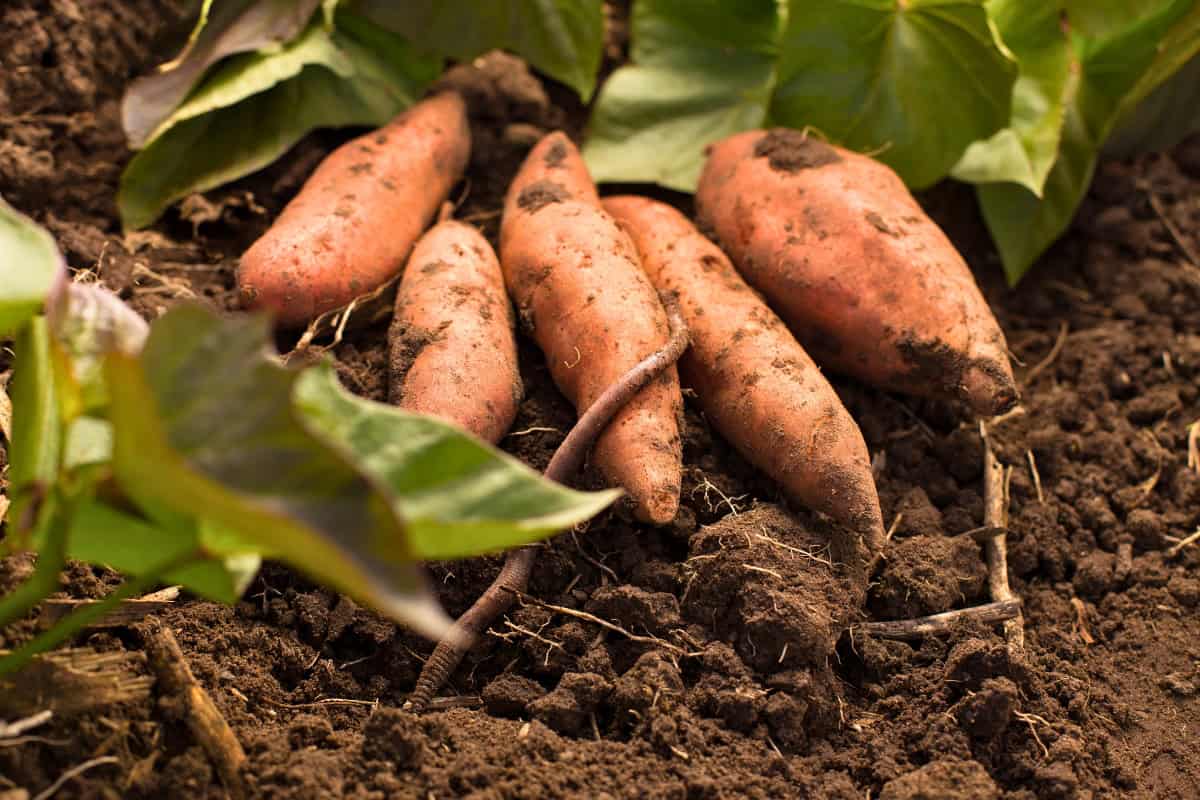
Successfully growing sweet potatoes will challenge everything you know about conventional gardening. In the process, you’ll learn the rules of a tropical crop.
Sweet potatoes, which are native to Central and South America, are bred for heat, humidity, and long growing seasons. Get those conditions right, and a single planting can feed you through winter and beyond. In this guide, we’ll cover:
- How to choose the right sweet potato variety.
- What tropical vines need to thrive.
- How to achieve maximum flavor.
- Curing and storing sweet potatoes after harvest.
Step #1: Choose a Sweet Potato Variety
Before purchasing your sweet potato starters, you need to decide on a specific variety. The variety you choose determines not only your yield, but also whether your plants will fit your available space, finish growing before frost arrives, and store well through winter.
Choose the wrong sweet potato variety, and no amount of smart growing will fix the problems that arise.

Vining or Bush: Which Sweet Potato is Best?
Sweet potatoes are categorized into two main types:
- Vining Types: Spread 6 to 12 feet and produce large yields.
- Bush or Compact Types: Spread 3 to 4 feet with smaller yields; best for small spaces.
Consider how much available space you have in your garden to decide whether a vining or bush sweet potato is the best choice.
Popular Sweet Potato Varieties
- Beauregard: A vining type with good flavor and yield. Matures in 90 to 100 days.
- Jewel: A vining type that’s excellent for long-term storage. Matures in 115 to 120 days.
- Georgia Jet: A go-to choice for short seasons with a vining habit. Matures in 90 days.
- Vardaman: Forms a 3- to 4-foot bush and is ideal for raised beds. Matures in 90 to 110 days.
- Covington: A great choice for storage with a vining habit. Matures in 95 to 100 days.
Most varieties need 90 to 120 frost-free days to reach maturity. Confirm your growing window before selecting a variety in order to ensure your potatoes will be suitable to harvest.
Step #2: Get Slips Growing
In order to start growing sweet potatoes in your garden, you’ll need slips. These are the baby green sprouts grown from a sweet potato that turn into new vines.
One large sweet potato can yield 10 to 20 slips over several weeks, making growing your own more economical than purchasing slips each season. Plus, you can also control timing, variety, and plant health when you grow your own. The quality of your slips will influence your harvest.
Phase 1: Slip Sprouting
Once you source certified disease-free seed potatoes from a reputable supplier, you’ll need to sprout them to create slips. Follow these steps:
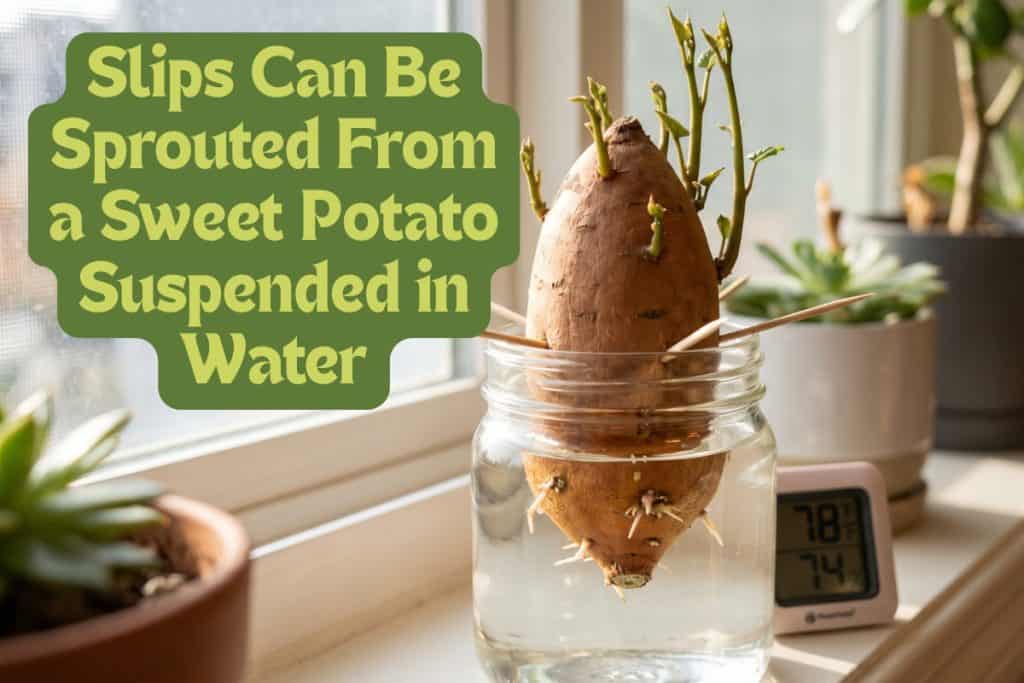
- Suspend the seed sweet potato halfway in a jar of water using toothpicks, with the narrow end facing down.
- Place the jar in a warm, 75- to 80-degree location with indirect sunlight.
- Maintain the 75- to 80-degree temperature throughout the sprouting process.
- Change the water every 2 to 3 days.
- Allow 4 to 6 weeks for sprouts to develop.
- Once sprouts reach 6 to 9 inches long, twist each one off cleanly at the base.
Phase 2: Pre-Rooting Slips
Once a sprout (or slip) is usable, pre-rooting it in water before planting in soil can significantly improve its performance. Slips that are planted with established root systems use moisture and nutrients immediately, giving them a head start over bare-stem transplants.
To pre-root slips in water:
- Stand harvested slips upright in a shallow container of water.
- Allow roots to develop for 1 to 2 weeks.
- Slips are ready when roots reach approximately 1 inch.
For another plant grown from underground starts, learn how to grow ginger here.
Step #3: Prepare the Soil
Sweet potatoes are root crops, so harvest quality is directly tied to the soil they grow in.
To create the best soil, start by choosing a location that receives at least 6 to 8 hours of sunlight daily. You should avoid sites that have grown sweet potatoes, tomatoes, or peppers in the past three years to prevent potential soil diseases.
Tubers need to expand freely through the soil in multiple directions as they develop. Any resistance they hit (like compaction, rocks, or hard clay) can result in forked, twisted, or stunted roots.
What is the Best Soil for Sweet Potatoes?
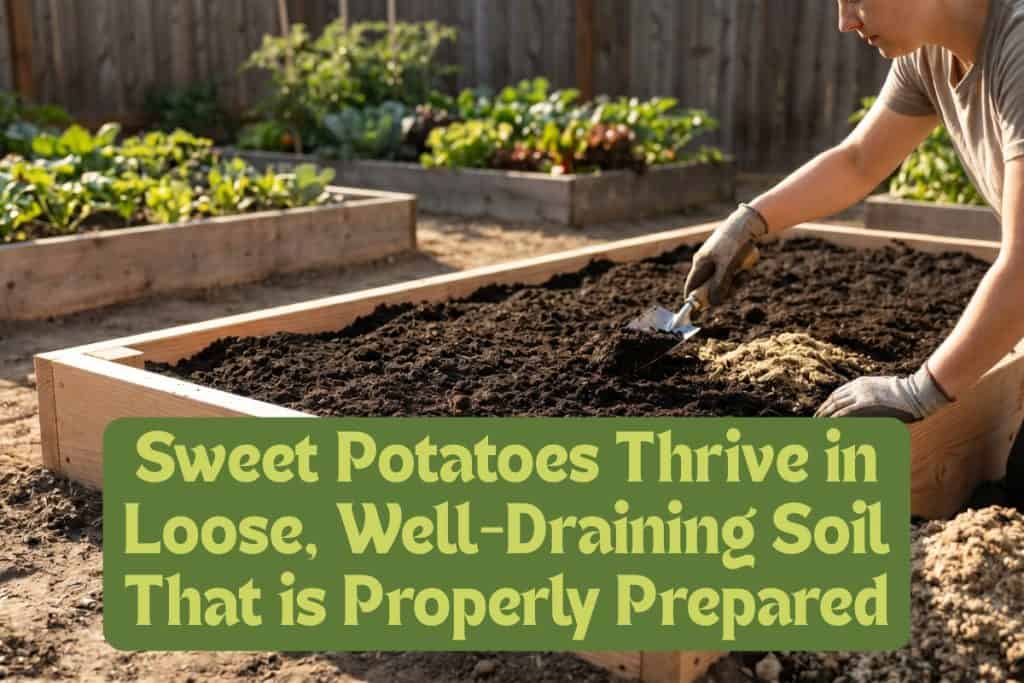
Sweet potatoes need loose, well-draining soil. It isn’t optional; it’s the foundation of a great harvest.
Sandy loam is the ideal growing medium. If you have heavy clay or compacted ground, don’t try to amend your way to loose soil. Instead, build raised rows or beds 8 to 12 inches high.
Step-by-Step Soil Preparation Steps
- Test soil pH aiming for a target of 5.8 to 6.2.
- If needed, adjust with sulfur (to lower pH) or lime (to raise pH) 2 to 3 weeks before planting.
- Clear the bed of all weeds, debris, and stones.
- Till to a depth of 10 to 12 inches.
- Incorporate 2 to 3 inches of aged compost.
- Build raised mounds or ridges 8 to 12 inches high and 3 feet apart.
Master another crop that requires loose soil and read our onion growing guide here.
Step #4: Plant Your Slips
Transplanting day can make or break the entire season for sweet potatoes. Slips that are planted under the right conditions, correct soil temperature, depth, and spacing tend to establish quickly and resist setbacks.
However, those planted into cold or poorly prepared soil can struggle for weeks and potentially never fully recover.
When to Plant Sweet Potatoes
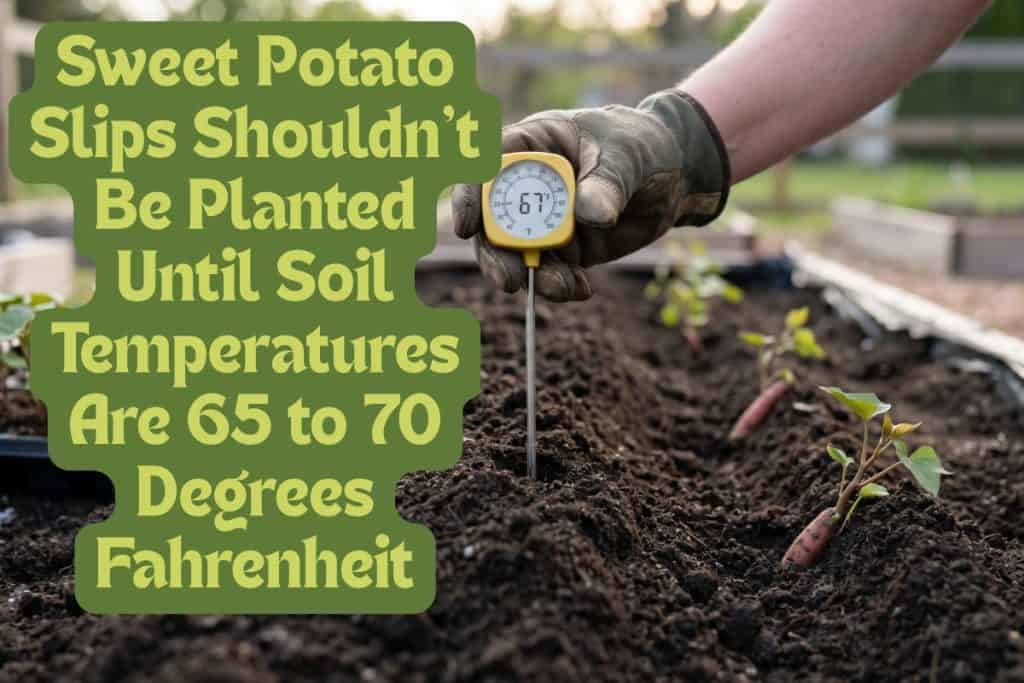
Sweet potatoes are tropical plants, so they respond badly to cold soil. They won’t grow and often rot at the base of the stem. Instead, wait until the soil temperature is completely stable to plant these potatoes.
An inexpensive soil thermometer removes the guesswork and should pay for itself in the first season.
Soil Temperature Checklist
- For the most accurate results, take readings in the morning.
- Wait to plant until soil reaches 65 to 70 degrees Fahrenheit at 4 inches deep on 4 consecutive days.
- Consider both the soil temperature and days-to-maturity of your sweet potatoes.
The Best Planting Conditions
As you consider when to plant your sweet potato slips, you should choose an overcast day or plant in the late afternoon to reduce sun stress.
Make sure to water slips before removing them from their container and handle them gently. Roots dry out fast, and the plants are more fragile than they look.
Slips that wilt in the first 24 to 48 hours after transplanting are not failing. This is a normal stress response.
If a late cold snap is forecast within two weeks of planting, protect slips overnight with a cover rather than pulling them out.
Space Out Your Slips
Spacing matters, both for yield and airflow. Crowded sweet potato plants will compete for resources and trap moisture, which increases the risk of disease.
So, don’t plant your slips closer than the recommended spacing for their growth type (vining or bush/compact).
Sweet potatoes planted on properly prepared ridges have the advantage of loose, elevated soil that drains freely, warms quickly, and allows roots to expand unrestricted to produce large, well-shaped tubers.
7 Sweet Potato Planting Steps
- In shorter-season climates, lay black plastic mulch over the bed 2 to 3 weeks before planting to warm the soil.
- Space plants 12 to 18 inches apart, with 3 to 4 feet between rows for vining types. Give bush varieties 2 to 3 feet between rows.
- Dig holes or furrows in the ridge 4 to 6 inches deep.
- Place each slip at a slight angle, burying the lower two-thirds below the surface.
- Ensure at least two nodes are buried, as each one is a potential spot where roots and tubers will form.
- Firm the soil around the base, eliminating air pockets.
- Water thoroughly and maintain moist soil for the first 2 weeks.
Learn about another tropical crop by reading our guide to growing pineapple here.
Step #5: Add Fertilizer and Water
Sweet potatoes have one goal: Producing tubers and making them as big as possible. That process is driven more by phosphorus than nitrogen.
Nitrogen encourages leafy, vegetative growth. While sweet potatoes do need some nitrogen to sustain their vines, too much will redirect energy into foliage rather than roots.
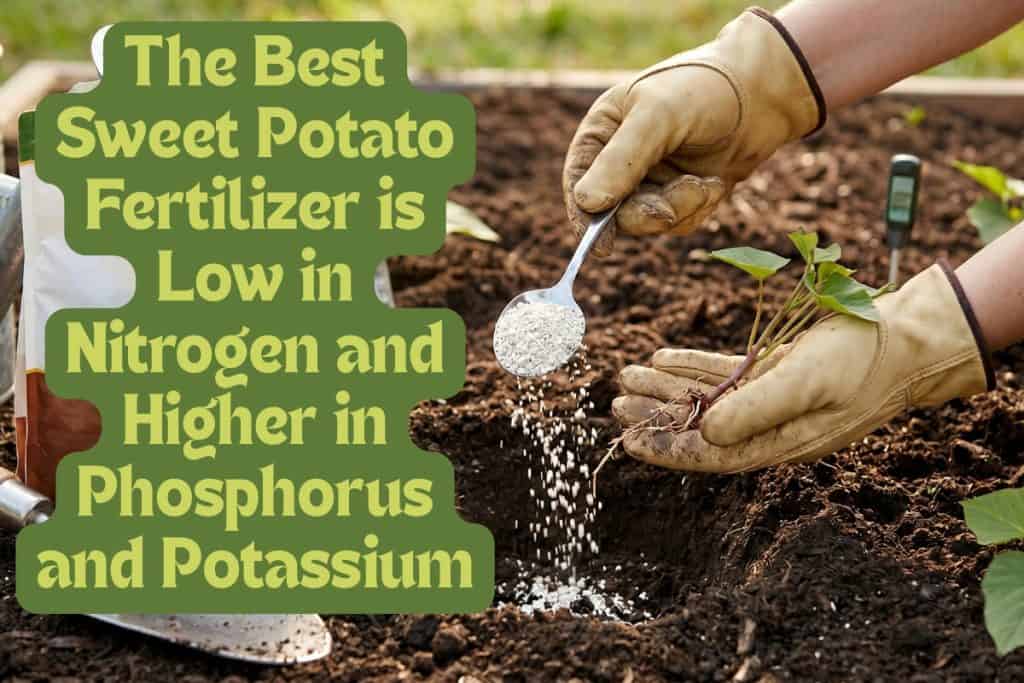
So, you’ll want to conduct a soil test before planting to take the guesswork out of fertilization. Then, you’ll be able to make precise amendments rather than estimates to help your potatoes thrive.
Basic Fertilizers for Sweet Potatoes
- Nitrogen (N): Too much of this fertilizer results in lush vines and small, watery tubers.
- Phosphorus (P): Promotes strong root development and increases tuber size.
- Potassium (K): Supports overall plant health and disease resistance.
- Bone Meal and Rock Phosphate: Two excellent organic, slow-release phosphorus sources.
How Much Water Do Sweet Potatoes Need?
Once your sweet potatoes are set in soil, you should strive for evenly moist soil throughout the growing season. Consistency matters, so balance your watering with weather and seasonal changes in mind.
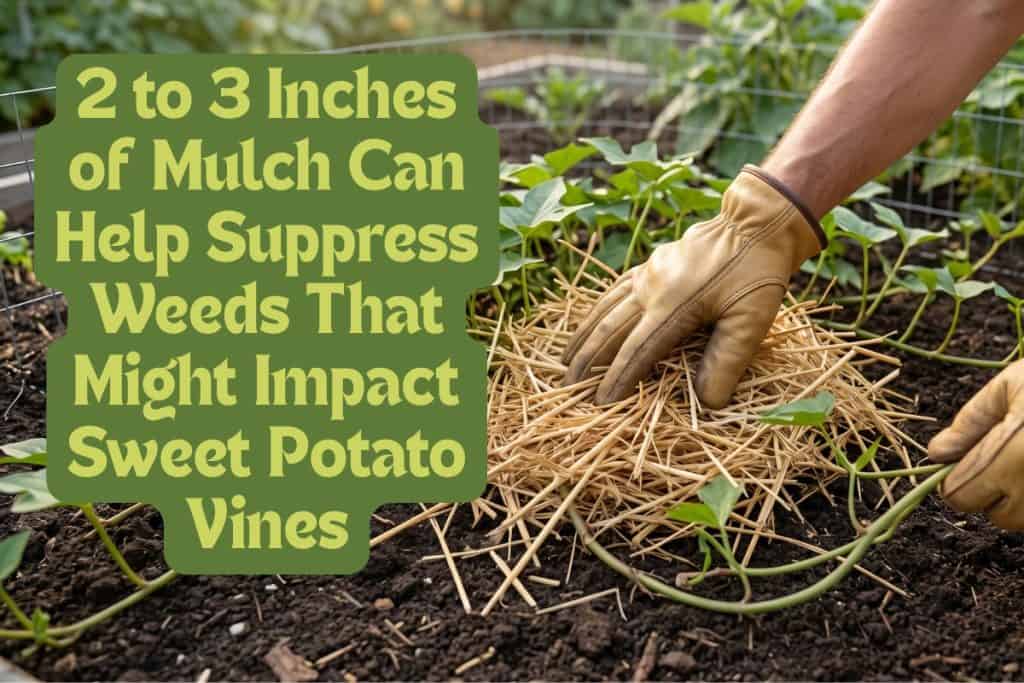
Mulching plants with straw or wood chips during the first two weeks after planting conserves soil moisture and reduces the need for watering mid-season.
Sweet potatoes planted in sandy soil may need more frequent watering, as this kind of soil drains faster and holds less moisture.
Critical Watering Windows
There are two critical watering windows to understand.
Water Window 1: The first 2 to 3 weeks after planting, when slips are developing their root systems and have no drought tolerance. Inconsistent moisture during this window causes establishment failure and stunted growth.
Water Window 2: This period occurs mid-season through pre-harvest and is when tuber development happens. Irregular watering during this phase causes tubers to crack, fork, and lose their shape. Similarly, too much moisture in the weeks before harvest leads to cracked tubers that store poorly.
How to Water and Fertilize Sweet Potatoes
- Incorporate 5-10-10 fertilizer or bone meal in each planting hole before transplanting.
- Apply a light low-nitrogen side-dressing along the row at 3 to 4 weeks after planting.
- Water immediately.
- Do not fertilize again unless a soil test shows a deficiency.
- Water 1 inch deep per week for the first month.
- After a month, switch to need-based watering.
- Cut watering back in the final 3 to 4 weeks before your expected harvest date.
Step #6: Keep an Eye on Vines, Weeds, and Pests
Once sweet potatoes are established, your focus should shift from growing the plant to protecting it. Vines, weeds, pests, and disease can all compete with or threaten your crop, and the most effective management is prevention.
Poorly-drained soil and excessively high fertility create the conditions pests and diseases take advantage of.
Maintaining Sweet Potato Vines
If you chose a vining sweet potato variety before planting, note that vines may attempt to re-root at leaf nodes that sit on soil. You’ll need to redirect wandering vines to keep the plant’s energy supply intact.
If you’re growing sweet potatoes in containers, you can train vines vertically on trellises without reducing yield.
Vines do have an advantage: You can use vines as ground cover to reduce the need for hand weeding.
3 Vine Management Steps
- Redirect wandering vines by hand every 1 to 2 weeks throughout the season to prevent rooting.
- Cultivate weeds shallowly between rows in the first 4 to 6 weeks before vines spread.
- Apply 2 to 3 inches of mulch once vines spread to suppress remaining weeds.
Sweet Potato Pests and Disease
For pests and diseases, choosing certified slips and rotating crops are your most powerful tools. The three threats most likely to affect your crop are:
- Sweet Potato Weevil: The larvae feed inside tubers, and damage shows only at harvest. No treatment exists once established.
- Black Rot: Dark, sunken decay on tubers that’s caused by a soil-borne fungus. Treat by removing and destroying any affected plants.
- Root-Knot Nematodes: These microscopic soil-dwelling pests that cause deformed, forked roots. You should choose plant-resistant varieties.
Deer and groundhogs may also become pests; they are attracted to sweet potato vines and can strip a bed overnight. Physical barriers or repellents are worth considering in rural gardens.
Read our asparagus growing guide here to learn about another crop where harvest timing is critical.
Step #7: Harvest Your Sweet Potatoes
When your sweet potatoes are ready to harvest, timing matters significantly.
Dig too early, and the tubers won’t have reached their full size or sugar development. Wait too long, and you risk chilling injury, which occurs when tubers are exposed to temperatures below 55 degrees Fahrenheit, resulting in off-flavors and internal discoloration.
The window between ready and too late can be narrow, especially in northern climates.
How to Tell When Sweet Potatoes Are Done Growing
You can’t rely on just one signal to be sure it’s time to harvest. Instead, you need two things to occur before you dig.
- Time to Maturity: Most sweet potato varieties mature between 90 and 120 days after planting. Know your variety’s days-to-maturity timeline before the season begins so you can harvest at the right time.
- Plant Behavior: Foliage naturally yellows and dies back as tubers reach full development. When this occurs, your plant’s work underground is done.
Perform a Test Dig
A test dig near the edge of a plant is always worth doing before committing to a full harvest. To perform a test:
- Gently unearth a single plant 1 to 2 weeks before your expected harvest date.
- Inspect tuber size and skin condition. If skin rubs off easily, the crop is not mature.
Don’t Wait Until It’s Too Cold
Regardless of what a test dig shows, the entire crop must be out of the ground before soil temperatures drop below 55 degrees Fahrenheit. At that point, cold injury to the flesh becomes irreversible.
Heavy rainfall in the weeks before harvest can cause fast tuber enlargement, resulting in oversized, rough, or misshapen roots. Monitor soil conditions during wet autumns and consider harvesting slightly early if heavy rain is forecast.
Harvest Protocol
In the final two weeks of your sweet potatoes’ maturity window:
- Monitor vine color and soil temperature daily.
- Perform a test dig on a single plant to confirm tuber size and skin set.
- 1 to 2 days before your planned harvest, clip vines at the base of each plant and remove them from the bed.
When you are finally ready to harvest:
- Harvest in dry conditions; wet soil clings to tubers and may damage skin.
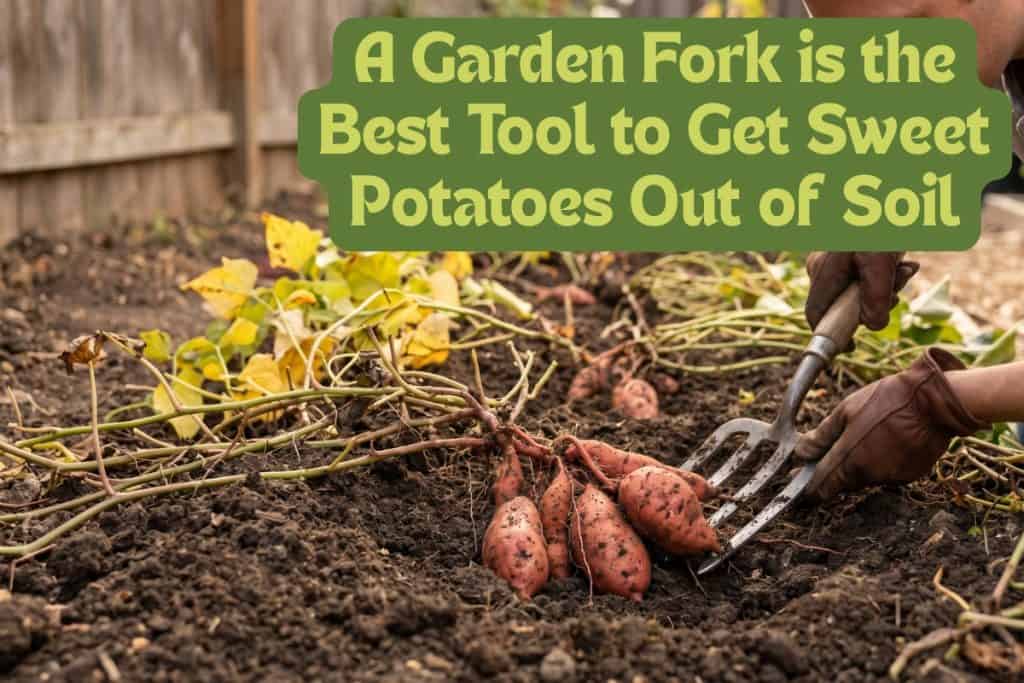
- Use a garden fork, not a spade, for less tuber damage.
- Insert the fork 12 to 18 inches from the plant base.
- Tilt upward slowly and loosen soil around the entire plant before lifting.
- Brush off loose soil by hand.
- Do not wash tubers before curing.
- Sort tubers as you go, setting aside any that are cut, cracked, or punctured.
- Move all tubers to a shaded curing space the same day.
Harvest Handling Tips
The skin on freshly dug sweet potatoes is thin and tears easily. Every cut, scrape, or bruise is a potential entry point for rot during curing.
Make sure to handle tubers carefully. Place, don’t toss, each one into a container.
Never stack harvested roots more than two or three layers deep before moving them to the curing space.
Curing and Storing Sweet Potatoes
Curing sweet potatoes before storing them is important, as it can make a noticeable difference in their flavor and shelf life. However, it’s the step most gardeners skip.
Freshly-dug sweet potatoes taste starchy because their sugars have not yet fully developed. Curing not only converts starches to sugars, but it also heals surface wounds by forming a protective skin layer called the periderm.
Without the periderm, every nick and scrape from harvest becomes an entry point for rot within weeks. During curing, the skin visibly thickens and becomes slightly rougher, more papery. This is exactly the result you are looking for.
Curing Conditions
To cure sweet potatoes, follow these steps:
- Lay tubers in a single layer with space between each root.
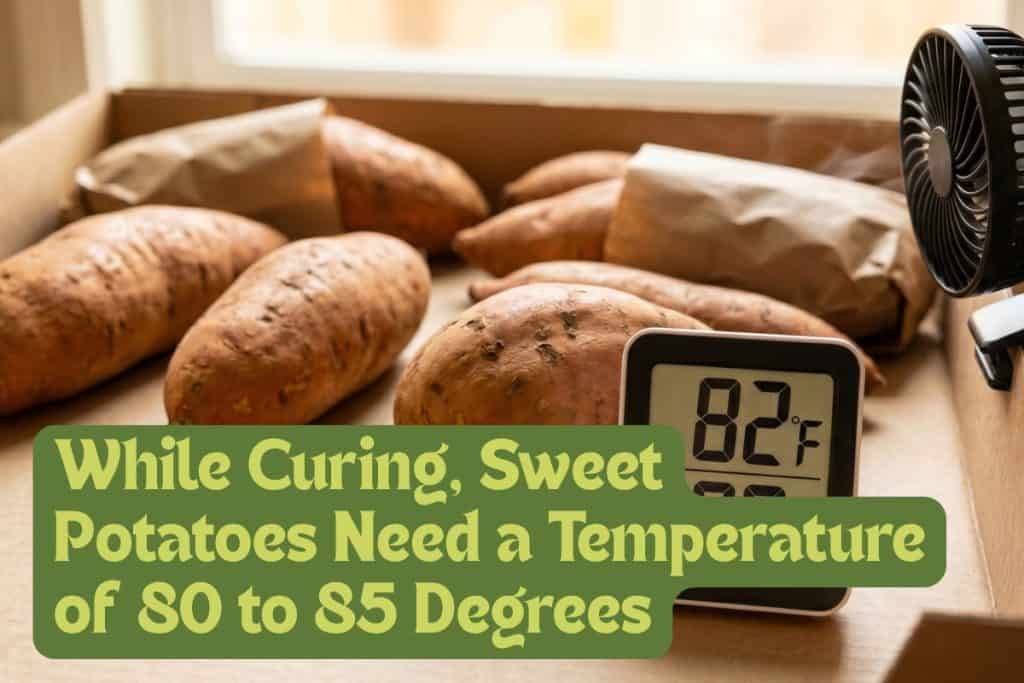
- Maintain a temperature of 80 to 85 degrees Fahrenheit and 85 to 90 percent humidity for 10 to 14 days.
- Run a small fan to maintain airflow and prevent moisture buildup.
- Wrap individual tubers loosely in paper to reduce contact and temperature swings.
To ensure you’re managing the curing process correctly, an inexpensive digital thermometer and hygrometer combination (which is available for under $10) lets you monitor both temperature and humidity at a glance.
Expert Tip: Never refrigerate sweet potatoes at any stage. This will turn the flesh dark and unpleasantly hard even after cooking.
How to Store Sweet Potatoes
A perfectly-cured sweet potato moved into the wrong environment will deteriorate as quickly as one that was not cured. In the right conditions, properly cured roots can remain firm, flavorful, and nutritious for six months or more.
If you’ll be storing sweet potatoes, temperature and humidity matter just like they did during the curing process. And airflow is equally important. Ventilation allows ethylene gas to escape and prevents surface moisture from encouraging mold.
6 Storage Steps
- Move tubers to their storage location immediately after curing.
- Maintain a consistent storage temperature of 55 to 60 degrees Fahrenheit.
- Keep humidity at approximately 85 to 90 percent.
- Store in shallow crates or mesh bags for airflow between tubers.
- Check stored crops every 2 to 3 weeks.
- Discard any tubers showing decay.
Saving Slips for Next Season
Saving your own sweet potato seed stock builds something increasingly valuable over time. Planting material selected from your best-performing plants, grown in your soil and climate, and adapted to your particular garden will deliver sure winners.
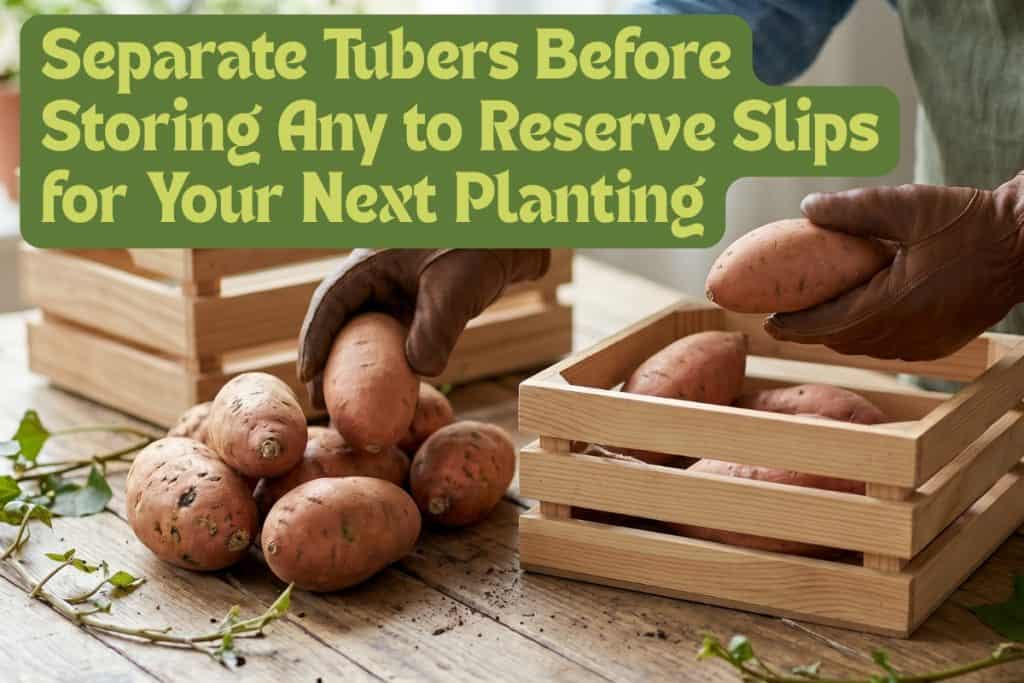
So, you should sort out medium-sized, well-shaped, blemish-free tubers from the highest-yielding, healthiest plants to use for the next year’s stock.
Sweet Potato Slip Protocol
- Set aside seed tubers before moving the crop to storage.
- Store those tubers under identical conditions for temperature, humidity, and airflow.
- Label seed stock clearly and keep it separate from eating stock.
- Never save tubers from plants that showed disease symptoms, unusual foliage, or poor root production.
- Refresh your saved seed stock with certified rootstock every 3 to 4 years to guard against gradual disease buildup.
- Begin the slip-sprouting process 6 weeks (8 weeks if pre-rooting) before your planned planting date.
Final Advice
Start small with your first round of sweet potatoes. Planting a single row of 8 to 10 well-prepared slips in properly-built ridges will teach you more about this crop than can be covered in a tutorial.
A well-tended bed can supply your household with lots of food, plus next season’s seed stock. Once you grow sweet potatoes successfully once, you won’t want to stop.
Happy growing!
12 thoughts on “7 Steps to Growing Sweet Potatoes: Variety Selection, Soil Prep, and Curing”
I see stackin containers advertised for growing tubers. Our soil is not good so am wondering if containers and using bagged soil would work as well as a raised bed. Thoughts?
I live on top of a mountain that is mostly rock and my neighbors and I all have them in 10-20 gallon grow bags and they do great. You can use the raised bed soil and also add 1/4 Black Cow manure. You could also add aged compost. I just stack them up out of the way in fall and refesh with some new soil each spring. Potatoes grow well in bags, trash cans, directly in the bag of soil, cardboard boxes, etc. Just put some decent soil in there and you will be fine. Give it a try.
Do you have any guidance on the curing process and storage for areas like Phoenix, AZ?
Hi, Phoenix is so hot, it would have to be really deep to be cool. I would contact your local extension service, they should have a lot of information for you specific to your county. Thank you for visiting.
I live in zone 7a where we have hot summers with lots of humidity. However, once sweet potatoes are harvested and cured, how do I maintain high humidity in my home (basement) during winter where we have to heat the house? I thought they were supposed to be stored in cool (55-60) temps with lower humidity. Thank you in advance for your advice.
Hi neighbor, I am also in 7a. About all you can do to store them for long periods is use a root cellar. Our soils don’t get that cool until you are pretty deep, but if you can dig a hole big enough for an old freezer, that would work great. Peopl give those old freezers away once they stop working. There are seveal YT videos that show people doing that. You can get a set of small temperature/moisture readers for about $10 if you don’t have any for your basement. Mine is finished and stays in the 60’s year-round but the humidity is also kind of high there year-round. At least they freeze dry and freeze great. Best wishes.
This is my first year planting sweet potatoes. Isaw one up out of the dirt so I dug it out. It was about the size of my fist. Tasted very good. when should Istart harvesting?
Seems pretty early to harvest, but you can dig one here and there all you want. They will just be small.
Most varieties need 90–120 days from planting (transplanting “slips”) to maturity.
Harvest in late summer to fall, before the first frost. Frost can damage the tubers even if it doesn’t touch them directly, since cold soil harms storage quality.
Signs they’re ready
The vines and leaves start to yellow and die back.
It’s been roughly 3–4 months since planting.
You can dig up one test plant to check size, they don’t need to be huge, just usable.
Enjoy your sweet potatoes!
This is information and teachings that can be used in Garden School. Thank you.
Hi Wesley, happy to help. Best wishes with the Garden School. No matter how long you grow, there is always more to learn.
We like the tops of the sweet potato plant to eat, but so do the deer will that affect my harvest of sweet potato
Yes deer like them. Most of the best deer repellents are systemic so the deer taste the plant and leave it alone, but that wouldn’t be good for anything you are going to eat. Best wishes fighting the deer.